Any links to Amazon are affiliate links. '
Showing posts with label emergency preparedness. Show all posts

How to Create a Home Fire Escape Plan

How to Create a Home Fire Escape Plan and fire safety for children

No one wants to think about the worst happening. We often push off planning for disasters because we either can't bare to think about it or do not think it could ever happen to us. For some, we might not know where to start. I do not intend for this post to be a fear-mongering post at all. It is to help you to be prepared and help you to have a plan in place in case a home fire happens in your house. The Red Cross reported that 93% of disasters they responded to were fire related.

How to Create a Home Fire Escape Plan and fire safety for children

Create an actual home fire escape plan

You need a plan. A real plan. "I will just save the kids" is not a plan. Many fathers like to say this. Many mothers are sure they would save their children. But what if one of you isn't there? What if something happens to you? What if there is no way for you to get to the child? The plan needs to be something that any child capable of being independent can take ownership of and do it themselves. If a parent couldn't get to the child for whatever reason, the child needs to be able to save him/her self (provided the child is able to do so). The plan needs to be concrete--an actual route that will be taken if there is a fire. 

There are obviously ages that babies and young children cannot do anything for themselves. In those cases, it would be a parent. Have a plan for who does goes to the child who needs help, but have a contingency plan for if one parent is unable to get there for whatever reason. 

Include options into your fire escape plan

In our plan, we have two ways to escape from each room. We have a way from the bedroom to the nearest door. We also have a way through the window in case the easier path, out the door, is blocked. 

We focus heavily on what to do if there is a fire at night during sleeping hours because that is when the child is alone. Night is also when the most deaths from fire happen, which make sense. We will also discuss ways to get out of the house if they are in different parts of the house. Most home fires occur in the evening, not during the middle of the night.

Have a meeting spot outside

We have a meeting place in the front yard and a meeting place in the back yard. Once you are out of the house, you want a place for everyone to gather so you can do a head count and know who is missing and who is accounted for. You also don't want your child wandering close to the house looking for you. 

Explain, walk through, and practice the plan

Once you have a plan set, pick a day to practice the plan. We practice our plan twice a year; once in the spring and once in the fall. The timing isn't important--just make sure the practice happens a couple of times a year. This keeps the plan in in the mind and allows you to adjust as your children age.

Here are some key points we teach:
How to Create a Home Fire Escape Plan and fire safety for children
  • We talk about not trying to pack things up or take things with them. We explain that material things can be replaced and that they need to get outside as fast as possible. 
  • We teach our children to lightly touch the door knob before opening any door; that way if it is hot, they won't burn their entire hand by grabbing the knob. Also, if it is too hot, it is wise to go to the widow option (or second exit option). If the way is blocked, they need to shut their door and leave it closed.
  • We teach them to open the door while on their knees. Smoke rises, so it is good to be on the ground so you can stay below the smoke level. 
  • They then follow the designated path to the nearest door. 
  • If that path is blocked, they return to the bedroom and go out the window. 
  • Once the child is outside, he/she goes to the meeting spot.
Once we have talked through those things, we practice it. It is valuable to physically go through the process to help solidify the plan. If a fire happens, you want your child capable and confident. It also helps you to see if your plan in your head will actually work. If your plan includes your child opening a window, you want to make sure your child is capable of opening the window. 

If your child can't get out a window for any reason, opening a window and calling through it can let rescue workers know where to go to save them. 

Prepare the home


The best preparation is prevention. Fires typically start in kitchens or at heat sources, so be vigilant with keeping those safe. 

Have smoke detectors throughout the home. Each level should have one and each bedroom should have one. Check these detectors regularly and keep batteries (if battery-operated) fresh. 

A fire extinguisher can be a good idea. The Red Cross recommends being trained on how to use an extinguisher before using it. 

If you have windows that are two stories or higher, you should have an escape ladder (affiliate link).

Conclusion

Having a plan will give your child the tools he/she needs to get out of the home safely in case of a fire.

Related Posts:

How to Prioritize Your Family Emergency Preparedness Preparations

I have no doubt that with all of the natural disasters that have hit recently that you have your family's emergency preparedness status on your mind. As you sit down to think about and plan out what you need to do for emergency preparedness, it quickly becomes overwhelming. There is so much to do that time and money are both very real limits on what can be accomplished right away. There is an order of priorities when it comes to emergency preparedness, so let's discuss what those are.

How to Prioritize Your Family Emergency Preparedness Preparations


Each year, we review our emergency preparedness in early October and early April--so every six months. We make goals for the next six months and review what we already have completed to be sure everything is still up to date. As you approach your plan, think of it in shorter increments like this, also. Don't get it all today (unless you have plenty of money to do so). Make attainable 6 month goals. 

First: Emergency Supply Kit
Your first priority needs to be a 72 Emergency Supply Kit for each member of your family. You need enough supplies that you could survive for three days without any assistance from anyone or anything if you were cut off from modern civilization today. I think at times we find this a hard thing to believe could happen, but with the recent disasters, we all have seen or even experienced that this can be true. 

Be prepared for this kit to need to be taken out of your home. It needs to be portable. Because of the nature of "emergencies," you won't know for sure if you will need to take it out of your home or not. Maybe you will be in your home and use it from there. In case not, you want to have the kits in something portable. 

Like I said, I review emergency preparedness every six months, and I tend to write about the things on my mind, so I have some posts on several of these topics I will refer you to.

As you approach your kits, you can either build them up slowly over time or you can just buy a pre-made kit and then build on that. 
Also, don't overlook the need for emergency supplies in your vehicle: Emergency Kits for the Vehicle.

Most areas have common natural disasters and weather impacts. This page will help you focus on being prepared for the disasters that can strike you. 

Second: Have a Water Supply
When I think about surviving with nothing, I know water is top priority. You obviously need water to drink for survival. You also need it for cooking and for hygiene

In your 72 hour emergency kit, you should have three days of water. That is why the kit comes before water. If you build your kit slowly, focus on water needs first. Once your kit is completed, store more water in your home if you have the space. For lots of help on this, see my post: Storing Water for Emergencies

In an emergency, when people have some time to prepare, the water is quickly cleared out of every store. Do not wait until  a hurricane is coming your way to head to the store and stock up on water. Have supplies in your home at all times. Then you are guaranteed to have it, even if the store is out when you get there. 

Third: Make a Plan
Good news! Making a plan is free. While I have this third, because it is free, it can be focused on while working on gathering the supplies above. When I was in college, I took a natural disasters class. In that class, I had to make a plan as an assignment. Where would I go if an emergency came up? What would I do if the roads out of my town were all blocked off for some reason? How would I get in touch with family?

This was an eye-opening exercise. Now that I have children, having a disaster plan is even more important. One thing we do well is practice in case of house fire. We need to do practices for other types of emergencies. We do our practices every six months while we are thinking about emergency preparedness

Here are two helpful articles on making a plan:
Fourth: Build Up a Food Storage
If you have the space in your home, build up a food storage for emergencies. We aim for a 1-2 year supply of items. This is listed last because you want to focus on the immediate emergency needs first. 

Having a food storage is financially very beneficial. It is of course handy for the unforeseen events that can hit your budget--a job loss, a medical emergency that brings bills, etc. It is also helpful for cutting your weekly grocery bill down. I tend to only buy things if they are on sale. So when pasta goes on crazy sale for less than one dollar per bag, I load up. I look like a crazy lady who really, really likes pasta (I mean, I do, but that is beside the point). I have gotten many weird looks and even questions from cashiers. But I rarely, if ever, pay full price for pasta. I don't even pay "eh" sale prices. I only pay killer sale prices. I do that with all non-perishables. I also do it with some perishables. When sour cream is on sale, for example, I buy as much as I think I will need before the expiration date is up. For more, see Emergency Preparedness: Food Storage.

If you are feeling a little anxious with the natural disasters that have happened as of late, hopefully this gives you some guidance as you work to get your family prepared in case you face a natural disaster in the future. 
How to Prioritize Your Family Emergency Preparedness Preparations

5 Must Have Items for Parents Keep in the Car


Without fail, the moment a child is required to sit still for a few minutes or more, the child will become thirsty. Not just thirsty. Parched. The child is suddenly dehydrated and is bound to die at any moment. This happens during family scriptures, at bedtime, and of course, in the car.

I have responded in logical ways, "We don't have any water in here, but as soon as we get where we are going, you can have a drink." That, of course, is not received well. The child is at death's door. How could logic work?

I have met the continued wailing with, "Then get a drink!" That usually stops the wailing for a while, and sometimes even for good. When the child is told to get a drink and realizes there really is no drink in the vehicle, the child just might stop the drama.

But hey, I am a problem solver. Here is the reality. Children don't even walk from room to room; children run. Children are movers and only pause when necessary (or when a screen is on). When the child is forced to sit still, the child will start to notice pesky things like thirst. The body does need water to survive, so the emergency is broadcast from the child immediately.

The child is thirsty and does need water for life to continue on. I like my children and want their lives to continue on. I also like not hearing the irrational meltdown that comes with the inevitable thirst in the car.

So I keep water in the car. Always.

There are other things I keep in the car as a rule. I have learned over the years that these simple things in the vehicle make life happier. As your children get older, you spend more and more time in the vehicle, so it is nice to keep what is necessary.

I don't over-do it. I don't mind children being "bored." I don't like having an over-crowded car, either. So these are the basics for survival (emotionally, mentally, and physically). This post contains affiliate links.

Water
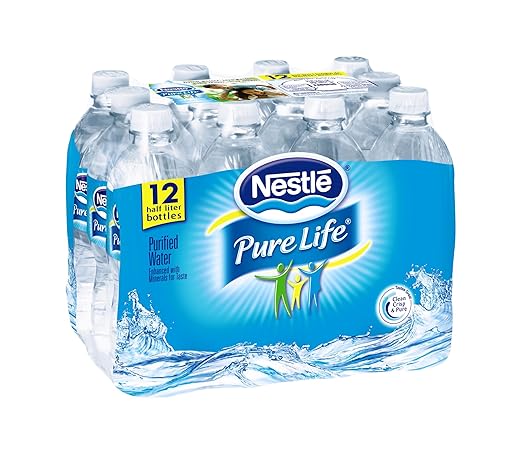
As I just discussed, I keep water in the car. I like to keep a case of water bottles in the car in case of real emergency. If we get in the vehicle and we are 10 minutes away from home and someone is going to die of thirst, I assure her she can last ten minutes until we get home. I don't like to open bottled water unless it is a must. If we got in the car and were 10 minutes away but we had been at the pool for the last few hours, for example, I would open some water to drink.

When we are going for a long drive--like an hour or more--we usually fill up reusable water bottles. We do at least one per person (our vehicle has a lot of cup holders). That way we can have plenty of water for drinking on our drive.

Food
I keep some food in the car at all times for emergencies, also. We are not a snacking family; we don't need to eat at all times. But I often find that a Brinley stuck in the car while we are driving people around is a lot more pleasant if she can have a granola bar every so often. I just keep a box of granola bars in the vehicle. We also use them often when I am driving Brayden to swim team or McKenna to cheer straight from school. They need a snack but are literally going from school to their activity. 

Books
I like to keep a few books in the car in case of boredom. We chose to not have a movie player in our car at all times. On really long car rides, we bring along our Kindle Fires and watch shows on those for part of the time, but for driving around town or driving usually less than 2 hours, it is books and music only. I keep picture books in there at all times for Brinley's entertainment. 

Motion Eaze
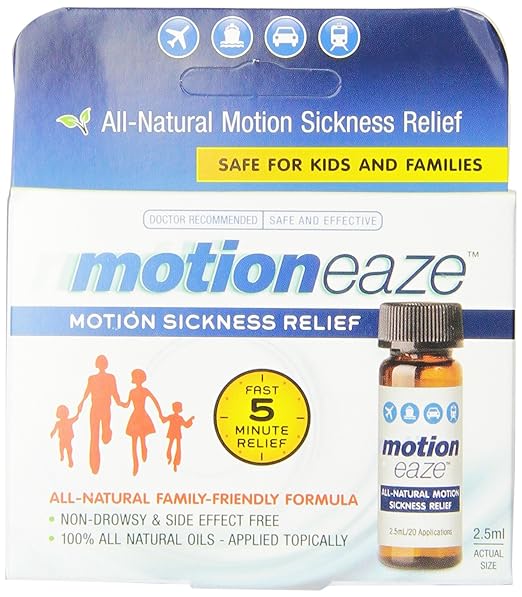
We have a couple of children who get car sick. They mostly only get sick when driving through canyons, and we live in the Rockies, so we are often going through canyons. They can also get sick if they look down too long. So we keep some natural drops that help with nausea in there at all times. Side note, these drops are fantastic if you have morning sickness. I also find they bring some relief when someone has a stomach bug. So I have one in the vehicle and a one in the house.


Wet Wipes
I mean, kids are dirty. We frequently need wet wipes, and always at random times. I just keep a package of wipes in there at all times. I has never been a regret.

Conclusion
These are five must-have items for you to keep in your vehicle at all times, year round, if you have children. There are other things that are smart, like an emergency kit, first aid kit, and blankets. Sunglasses, tissues, napkins, chapstick, pens...those are all things that you might find handy at times. These five listed above will be common sanity savers for you and your children. Then when your child buckles that seatbelt and suddenly realizes how parched he is, you can respond with "Here's some water" and get peace in return.

If you don't already, be sure to follow me on Facebook. I share what is posted here each day along with other articles I find helpful and interesting. I also answer questions and do live Q&As each week. It is a great way to connect!

72 Hour Kit Food


In the event of a disaster, you can possibly face a three day (72 hour) wait time between the disaster and aid reaching your area. Being prepared to face that three day wait can be the difference between life and death. Each member of your family should have a 72 hour kit. This post contains affiliate links. This does not increase your cost. 

One of the categories for a 72 hour kit is food (for a full list, see my post on 72 Hour Kit Free Printables). You can purchase a pre-made kit all ready for you (which honestly isn't a bad idea). We have been working on creating our own kits for years. The idea was that we could save money over buying a pre-made kit, but I am not sure if that is true or not in the long run. The pre-made kits are not as complete as I would like a kit to be, but they do have the basic vitals. 

I recently stocked up our kits with food. If you are like me, you will have a hard time spending money on things you hope to never use. It is hard! It is also wise and is something you won't regret in case of an emergency. Here is what we went with.

Mountain House Just In Case 72 Hour Kit

This is a spendy item at about $55.00 for a 3 day supply of food. I decided to buy two kits to share around our family. However, after purchasing them and shopping around, I bought a third kit. These kits last at least 12 years, where food I was looking at in the store rarely made it a year. I wanted the food to be light-weight and easy to prepare. With these kits, you just add water to the bag. Very simple. I decided this food was a good way to go so we don't have to rotate often, it can be light, and the taste can be manageable. I realized by the time I need to rotate this food out, at least Brayden and Kaitlyn will be moved out and on their own (wow!). So while it was spendy now, it will be less expensive the next time. I figure when it comes time to rotate, we will use these on a camping trip. 

Oatmeal 
I don't mind having food in our 72 kits that needs to be rotated often if it is a food we will eat. We will eat instant oatmeal, so I purchased enough instant oatmeal for each kit for breakfast for 3 days. That way when it is time to rotate the food, we can use the oatmeal up without grossing ourselves out. 

Sterno Folding Stove
The tricky thing to these pouches and the oatmeal is that you need hot water. I purchased a few folding stoves--one for my husband's kit, one for mine, and one for Brayden's since he is old enough to be able to operate it easily. They are light and fold flat, so they don't take up too much space in your 72 hour kit. 

Bakers & Chefs Safe Heat
You need a heat source for your folding stove. You can buy Sterno cans; I went with this less expensive brand. It rates well and I have used items from that company before with great satisfaction.

Coleman Mess Kit
You can buy fancy mess kits. Since these are just for our 72 kits, I bought a basic mess kit for each 72 hour kit. A frying pan, a pot, a plate, and a cup. It will work for what we need and it is less than $10.00 each. We can use it for dishes and/or for heating water. 


Brothers-ALL-Natural Fruit Crisps
No one wants to just eat a small pouch of freeze dried food three times a day. Morale is worth something. I got enough of these fruit crisps for each person to have a few each day. Again, this is a food we won't feel bad eating if we need to eat it to rotate the food in the kits and keep it fresh. You could do any sort of dried fruit, including rasins. 

Granola Bars
I also put a few granola bars per day in each kit. Again, morale, and again, a food we can eat when needed to rotate before it expires. 

Hard Candy
Hard candy is a good one to have in the kits to help give you some variety. You can purchase hard candy, or you can do like we did and set some aside from parade candy or Halloween candy (or pick any other candy day that comes along...). 

MREs
Another option for food is an MRE. An MRE provides a lot more calories per meal than the food packs I bought (listed above). Shelf life is 5-10 years on these, and they definitely are not any cheaper--they are actually more than twice as much money. But you could probably eat one as your lunch AND dinner since the calorie content is so high. These do not need water added, so you can get these and skip the stove and fuel cans. It is worth considering. 

Here are other posts on Emergency Preparedness:

Storing Water for Emergencies

Getting prepared for an emergency can be daunting. It isn't quick and it isn't cheap. When you consider the likelihood of needing to use these things you store, it can be hard to dredge up the motivation to actually do it. The fact is, however, that you can't prepare after the emergency and emergencies just don't give you fair warning. You need to prepare.

When starting your emergency preparedness, it is wise to start with water. Storing water can be pretty inexpensive. It also is very necessary. You can only survive 3 days without water. As a parent, you aren't going to be able to curl up in a ball and wait it out and hope water comes soon. You will need water so you can take care of your kids. 

You children also need water. Have  you ever been trapped in your vehicle with thirsty children and no water? They really seem to think they are going to die needing to wait another ten minutes until you get home and can give them water. Thirsty children are not fun. You don't want to be stuck without water. This post contains affiliate links. 

Storing at Home
It is a great idea to have water on hand at home for emergency use. Unfortunately, the need for this seems to come up more often than just a natural disaster. The water can be shut off to your neighborhood for various reasons, from an accident to maintenance. You can also get into a situation where your city's water is contaminated. This leads to not being able to use your water for typically 1-3 days (sometimes more).

So I suggest you store water at home. 
  • You can keep store-bought bottled water in your storage. 
  • You can keep some water in your refridgerator. This obviously would not help you out long term, but if your water-main was shut off for a few hours, it could get you through that.
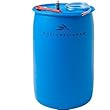
  • You can store water in containers. We have a 55 gallon drum of water in our storage room (pictured below). You can buy ccontainers made for water storage (pictured below). You can also simply save old 2 liter bottles and store water in those.
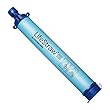
  • You can store a water filter. We own a LifeStraw Family 1.0 Water Purifier. This is pictured above. It "Purifies 18,000 liters/4755 gallons WITHOUT iodine, chlorine, or other chemicals; Clean drinking water for a family of four for 3 years". You can find water from the rain, in rivers, in ponds, from streams, melted snow...this will enable us to purify water if we need to. 
I won't reinvent the wheel and explain how to purify water here. I am not an expert like people who have created documentation for purifying water. To learn how to do this safely, check out these links:
Store for 72 Hour Kit
In reality, storing water at home is the easy part. Having enough water for your use at home just takes a bit of forethought, planning, and work. It isn't too difficult. Trying to figure out water for a portable 72 hour kit is the real trick.

You need one gallon of water per person per day. That means for a 72 hour kit, three days, you need three gallons of water per person. Can you imagine stuffing three gallons of water into your 72 hour kit and then carrying that around on your back? I try to make our 72 hour kits so we can each individually carry them in case our transportation is our feet. Three gallons of water is heavy. Here are our solutions.


  • We started with water pouches. We put one gallon in each person's pack. One gallon was enough to make it seem heavy--especially considering that water isn't the only think you are packing in your 72 hour kit. I want us to start off with guaranteed water. I figure the first day of needing to use a 72 hour kit could potentially be the most stressful and this way we won't be desperate for water immediately.
  • I did some digging and came across the LifeStraw. This is how I found the family filter I talked about above. They also have Personal Water Filters. This was a Time Magazine invention of the year winner. You can use this straw, stick it directly into dirty water, and drink through the straw. It is extremely light (less than one pound). Each straw filters 1000 liters. I put this and an old water bottle in each person's pack. This way we can fill up a bottle for the kids to drink from so they don't have to lean over the river or pond to drink. I think that would help mentally. Also, we could take water with us if we were moving away from the water source.
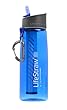
  • LifeStraw has since come out with a water bottle/lifestraw combination. It looks fantastic. I want to put some in our vehicle for emergency water for our car kits. LifeStraw Go Water Bottle with Integrated 1000-Liter LifeStraw Filter

Related Posts:
Be sure to check out these posts of mine on emergency preparedness:

You can also follow our BFBN Emergency Preparedness board and our Safety board for more tips. You can also see my Emergency Preparedness board for tips.


Today the ladies of the BFBN are all sharing safety tips. We have everything from carseats to babyproofing. Be sure to check them out!


Living Within Your Means


Today the ladies of the Babywise Friendly Blog Network are all talking about emergency preparedness topics. In the past, I have covered a lot of basics on emergency preparedness. I have talked about Food StorageEmergency Kits for the VehicleLifefolioFood Preserving, and 72 Hour Kit Tips. I have also shared ways to organize with my 72 Hour Kit Free Printables and Emergency Preparedness Binder

Today I want to go into a topic I haven't covered in the past, and that is living within your means. Living within your means is simply spending less money than you make. This is such an interesting topic to me because I think if you sit and discuss it on a logical level, everyone can easily agree that yes, it makes sense to not spend more money than you make. If you spend more than you make, then you will be in a tough spot. You will also end up paying more for things because you will be paying interest on whatever you are buying. 

Then you step away from that conversation and you find yourself living real life. You find that you see something you really want, and you want it now. You think about all the reasons you need it now. You think about how much easier your life will be, how much more enjoyable life will be, or how it will basically not be worth buying it in the future. 

The next thing you know, you have purchased something on credit and you have extended yourself beyond your means. You now have interest to pay. 

We have to learn to control ourselves. We have to be responsible. We have to say, "I will save up my money for that and then buy it."

I like to heed advice to limit what you are willing to go into debt for. These are:
  1. House
  2. Education
  3. Vehicle
Now, with all of those things, you need to apply the term "modest" to each one. A modest home. Do not go into as much debt as the bank is willing to give you. Also, if you need to go into debt for a vehicle, keep it modest. 

So what is the big deal about living within means? Why should we care? Why not live it up?

1-Debt hurts marriages
One of the leading causes of divorce is financial problems. Many studies say it is the number one cause of divorce"According to Jeffrey Dew’s paper titled Bank on it: Thrifty Couples are the Happiest,when a spouse feels the other spends their money foolishly, it increases the likelihood of divorce by 45%" (source here). Anderson points out here that a key word here is "feels." Both members of the partnership need to be on the same page of how money will be spent.

If you have ever been in a lot of debt, you know how taxing that stress of the debt can be on your marriage relationship. Maybe you both are placing too much value on material things and letting it get in between your relationship. Maybe you fight constantly because you are both so stressed out about how to get out of this debt-binding situation. 

It is important for couples to get on the same page financially and to make a plan on how to spend and save money. 

2-You will never make enough money
I just don't think people ever make so much money that they can't spend it all. The more money you get, the more you think about spending it on. Higher incomes will equal larger homes and fancier cars. People in general can't seem to ever be satisfied with what they have.

When we were first married, we made so very little money. We were both students full time who were working part time. We lived in a tiny little thing someone called an apartment (and we believed it). We spent maybe $25 a week on groceries. We rarely ate out. We pinched our pennies in order to get by.

Today, we make a significantly higher amount of money. Neither of us feel, however, happier than we did when we were first married. Yes, we can afford more, but in many ways, we don't have a lot more free income. Our fixed expenses have grown. We live in a house on a good piece of land. We own two vehicles instead of one. We have children to feed and clothe. We have internet service and dish TV. 

Despite making more money, we are not happier nor are we able to buy whatever we want whenever we want to.

I say all of this to convince you that it is worth the discipline it takes to be willing to live within your means. Living out of it will not make you happier. Debt is binding. 

3-Money can work for you
When I was in college, I took a fabulous class called "Personal Finance." My professor stressed the importance of living within your means and saving for your future. She pointed out that money can work for you. Like I said before, debt is binding. It is a "harsh taskmaster." You can, instead, make your money work for you. You can save and invest and let the interest be on your side--coming to you instead of paying for it. If you can discipline yourself to wait to save for something before you buy it, you will find yourself paying less money for it and earning some interest along the way.

4-Letting debt take over is allowing yourself to become indulgent
If you can't be patient for something and save up for it, you feed indulgence within yourself. Learn to distinguish between needs and wants. Do not let yourself go into debt over a want. Don't do it. Spend less than you bring in and put money in savings. 

Conclusion
I know it can be super, super hard to save for what you want. Despite my extremely frugal nature and my husband and I agreeing from the beginning we wouldn't ever go into debt for a want, we have done it from time to time in our marriage. It wasn't fun. We are in a place now where our debt is our home and that is all. It is a very nice place to be. 

Even with having the experience we have, the conversations arise of, "should we just go into debt?" Should we go into debt to get a nicer camp trailer? Should we go into debt to do an addition on our home? Should we go into debt to buy a truck? Should we go into debt to go on vacation?

Happily, these conversations always end in "no" now. It is very satisfying to have a financial goal and reach it. It is much more fun to go on vacation with money you have saved. It is fun as a family to forgo certain treats at the grocery store to help us reach our next financial goal sooner (I seriously love this for shopping with my kids. "If we buy that treat, it will make it that much longer before we can go to Disneyland"--I don't get begged at anymore!). 

If you are not living within your means, I highly encourage you to start. Start paying down that debt. Cut the things you can cut. Save what you can save. You will enjoy more peace. You will be prepared for the difficulties that surely will come. You will have less, but your heart will be more content. It is so worth it.

Be sure to go check out the other BFBN ladies today for more emergency preparedness info!

Here are some resources I have found on Pinterest that are helpful:


72 Hour Kit Free Printables


It is that time of year that I like to remind us all to take a look at our emergency preparedness status. Today, I have two printables for you to use if you like. 

The first, pictured on the left above, is a sheet of a list of things to pack in your 72 hour kit. I left some blank space so you can add things if you have other ideas you want to add to the list. This list is for one person, so each person would need the items on the list. 

For little kids, we leave out a lot of things. To have it all would be super heavy for a little one to pack around. There are also items I don't want a four year old to have, like a knife. These lists also do not include things like diapers, stuffed animals, crayons, etc. that you might want to pack for a child.

This entire list is really too big to fit everything into one kit. My husband and I split some things up, while still trying to make sure each of us has enough to get us through if we were separated. 

The second printable is a sheet for your emergency contact information. You will put the person's name in the top blue bar. Under "Family Information," you will put who is in the family--names of parents, spouse, children, etc. You also add a family picture. Under "Emergency Contact Information," you will fill in your home address. Then you will list contact phone numbers. Include spouse, parents, grandparents, friends, etc. who can be contacted in case of emergency. Be sure you have some long-distance phone numbers listed--they say long distance phone calls are the first to be restored in emergency situations. The "Personal Information" box is self-explanatory. The "Medical and Insurance Information" is also self-explanatory. Just fill it in and add a photo of the person. We have one of these in each person's kit.

Here are other posts on Emergency Preparedness:

Emergency Prepardness: Lifefolio

image source

It is the time of year when I like to evaluate my emergency prepardness items and make small, manageable goals for the next six months. 


My husband and I recently attended a class on building your "lifefolio." Your lifefolio is basically a compilation of all of your critical documents. You have your birth certificates, drivers liscence info, social security cards, cemetery plot deed, living will, military papers, insurance information, financial documents and information, investment documents and information...lots of paperwork :) Here is a link with explanations. Here is a link to a free PDF checklist.

My husband and I totally need to get this complete! Something that has always slowed me down in this area is deciding who leave our children to in case we both died. It is such a hard decision for us. Anyway, I thought I would bring this to your attention because I am guessing a lot of people out there are in the same boat as we are and need to work on this. 

Here are my other posts on Emergency Preparedness: