Any links to Amazon are affiliate links. '
Showing posts with label making babyfood. Show all posts

Making Baby Food

Making baby food is really quite easy to do! There are entire blogs and large books published on the topic, so this will not be an inclusive post on how to make all baby foods, but rather a post that breaks it down into the basic steps so you can see how easy it is and consider venturing into the world of making baby food. You can see my post "In Action: Making Babyfood" for more information and for reasons why I think you might like to do so.


Here are the basic steps in making any food.

STEP ONE: COOK THE FOOD IF NEEDED
For any vegetable, you will need to cook it. For younger babies, fruits will need to be cooked until six months old. After that age, you don't necessarily need to cook a fruit. 

You can cook the food any way you like the food cooked. My opinion is that veggies taste better baked than boiled or microwaved, so I bake my food for my babies. For carrots, I cook them in the slowcooker. Whatever method you choose, you want the food to be very soft when done, so steaming might not be the best method for baby food for certain foods--I guess unless you steam it longer than I would steam for myself. I like my steamed veggies crisp. You can easily search recipes on the nice worldwide web for how to bake, microwave, boil, or slow cook vegetables.

Cooking Tip: For cooking sweet potatoes, put a drip pan or a cookie sheet on the rack under the sweet potatoes. You cook them on the rack, but the juices will start to drip out at the end. With a drip pan or cookie sheet, you can just clean that up instead of having to clean your whole oven.

STEP TWO: REMOVE SKINS
If you microwave or boil your vegetables, you will remove skins before you cook them.

Sweet potatoes will literally just drop out of the skins when they are baked. I just take them out of the oven and let them cool enough that I can work with them without burning my fingers. I then cut them in half and let them cool more if I need to. I then hold it over my Cuisinart and just let the flesh drop out. 


For squash, I use a cookie scooper as pictured above. I scoop the squash out and drop it into my Cuisinart.

cooked squash

 If you are not cooking your fruits, you might want to blanch the fruit to aid in skin removal. Blanching sounds ominous before you try it. Google ways to blanch for videos or tutorials. Basically, you have a pot of boiling water on the stove and a sink full of ice cold water. You put your food in the boiling water for usually 1-2 minutes, then remove and put it in the ice cold water. The skin will then easily slip off (if the fruit was ripe--under ripe fruit doesn't blanch so well). 

STEP THREE: PUREE FOOD
One way I puree the food is in my Cuisinart Food Processor. I put any food I have in large quantities in this. For example, I do squash, sweet potatoes, carrots, peas, prunes, and green beans in this.

Another way to puree the food is with a Baby Food Mill. I use this for my bananas and avocados. You could use it for strawberries if you wanted to puree them. I will also use it to quickly puree some pears or peaches that I have preserved in mason jars. You could do smaller portions of the other foods in this, too. So if you made squash for the whole family, but wanted to puree some for baby, you could do just one portion in this.

I also use this for squishing up my bananas for banana bread. It is an inexpensive baby tool and I find it useful beyond baby food.

You can also use the old fashioned method of a fork to smash things up. A blender works great as does a potato smasher.
Food Mill


STEP FOUR: FREEZE THE FOOD
The food will last for a couple of days in the refrigerator, so I save a couple of portions for baby in the fridge. The rest goes into ice cube trays. I scoop it using a spoon or my cookie scooper. I use traditional trays and the trays from Fresh Baby. I like the Fresh Baby ones best. The lids help keep the food fresh and you can stack the trays easily.

Once it has frozen (usually about 12 hours) you can move it into freezer bags. I write on the bag with a permanent marker with what it is and the month and year I made it. Then each morning, I get out any cubes I need for the day and put them into baby bowls with lids.

CONCLUSION
See! Four basic steps to making your own pureed foods. I make enough at once that I only have to do it every few months. For keeping track of what you have introduced and what you plan to introduce, check out my free printable Baby Meal Planner.

RESOURCES
There are two resources I like best. 
  • Wholesome Babyfood.com: This is a great site, and is really the only resource you would need. Something nice about a website is that it is dynamic and they keep current recipes on the homepage. It offers lots of different recipes for each food. If you check out the avocado section, you will see several different ways to prepare avocado for your baby. This isn't really necessary; baby is fine with the same old thing over and over, but you might find it fun.
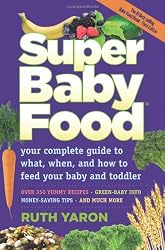
  • Super Baby Food : This is my favorite resource. I am more of a book person than a website person. I like to have books to look through. I keep this book in my kitchen with my recipe books. This book is worth it even just for the section on how to choose, store, prep, make, and keep all fruits and veggies. I use it for the whole family! If you prefer books, I would get this.
  • Fresh Baby So Easy Baby Food Kit: I use this book for quick reference in finding what ages foods are recommended for. This book has fast microwaving tips. It also has great ideas for spices and herbs that go well with different foods. 

Easy Homemade Yogurt


Making yogurt is really quite easy. Much easier than I ever thought it would be. Thank you to my neighbor, Laura, for teaching me how! The amount of time you need to spend actually working on it is very little, also. To do one batch, I spent 30-40 minutes working on it. This is great because you can use the ingredients you want to, add as much sugar as you want to, and flavor it how you want to. Instead of paying 3-5 dollars (or more) per quart, you end up spending around one dollar per quart, more or less depending on the ingredients you use.

SUPPLIES:
INGREDIENTS:
  • 1 gallon milk
  • 1 cup sugar (more or less to taste--my neighbor likes 1 1/2 cups sugar instead)
  • 1 1/2 Tablespoons Vanilla (or whatever flavoring you want)
  • Yogurt --half of one quart (this is one large container of yogurt). You only need 2 T per quart, but my neighbor does half of a container, so I do too. You can use plain yogurt or flavored yogurt. I like plain.
TIME:
Prep time is about 30-40 minutes.

Processing time is 8-10 hours depending on taste. Because of the long processing time, I like to start this in the morning, but if you are a night owl or don't mind setting your alarm for the middle of the night, you could do it in the afternoon. You could also do it in the evening and take the jars out in the morning.

YIELD:
Yields 5 quarts. My neighbor doubles the recipe and makes 10 quarts at a time. To double it, you will need a large stock pot--about 20 quart.

METHOD:
  1. Pour gallon of milk into stock pot.
  2. Heat milk to 185 degrees, stirring occasionally to prevent the milk from burning on the bottom. Once your milk reads 185, stir it take the temperature again to make sure it is at 185. You are killing bad bacteria here.
  3. As your milk heats, make sure your jars are ready to go and your cooler is ready to be used.
  4. Remove from heat.
  5. Add sugar. Add as much as you like. Stir until dissolved.
  6. Cool to 130 degrees. You can either stir it until it cools to 130 or you can put the pot in the sink and fill it with cold water and stir it until it is at 130 degrees.
  7. Quickly stir in the yogurt culture and vanilla. I would recommend a whisk here so you can get the clumps of yogurt distributed evenly. I used almond instead of vanilla and it was amazing. I love almond.
  8. Pour into quart jars. I use a canning funnel and a pyrex measuring cup to pour it. My neighbor just dunks the jar into the stock pot to fill it. You can fill it how you like, just work quickly.
  9. Put lids on finger tight--this means just as tight as your fingers will close it.
  10. Put the jars into your cooler. 
  11. Add enough hot tap water to cover the jars. You want the water at 120-130 degrees. 
  12. Close the lid and leave for 8-10 hours. The longer you leave it, the more sour it gets. I did 9 hours.
  13. Remove from cooler, dry jar, and put in refrigerator. 
SOUR CREAM:
You can also try to make a healthier and cheaper sour cream. To do so, omit sugar and flavoring. Process in the cooler for at least 10 hours, possibly more. I haven't tried this yet, but plan to.

ITEMS USED:


Fresh Baby Dishes {Giveaway!}

This post is sponsored by Fresh Baby. All opinions are my own. 

Last year, I did a review on the Fresh Baby Baby Food Kit. I have loved Fresh Baby. They rolled out some new products this year and sent some to me to review.

They. Are. Cool. 

Really--they are great and innovative for making the whole food process much easier.

Above you can see a picture of the Divided Dish. Here are some cool features:

Movable Divider Keeps Food Separate
Double Body Construction:
  • Separates for Easy Cleaning
  • Keeps Food Warm & Cool Longer
  • Outside shell never gets too hot
Airtight Lid:
  • Spill-proof
  • Keeps food fresh
  • Great for On-the-Go
Dishwasher Safe (top rack)
Freezer Safe
Food Safe
Size: 9 fl oz/250 ml

Material:

Bowl: 18/8 Stainless Steel
Outer Shell: PP - Polypropylene (#5)
BPA, Lead, Melamine & Phthalate-Free


The other item they sent to me is the Baby Bowl.

Stainless Steel Bowl Features:

Double Body Construction:
  • Separates for Easy Cleaning
  • Keeps Food Warm & Cool Longer
  • Outside shell never gets too hot
Airtight Lid:
  • Spill-proof
  • Keeps food fresh
  • Great for On-the-Go
Dishwasher Safe (top rack)
Freezer Safe
Food Safe
Size: 10 fl oz/300 ml

Material:

Bowl: 18/8 Stainless Steel
Outer Shell: PP - Polypropylene (#5)
BPA, Lead, Melamine & Phthalate-Free 

Pretty neat right? I love them. 

One of you lucky readers will win your own divided dish and bowl! Hooray! So let's do the entering business.


For Your First Entry:
Become a follower of this blog. Then leave a comment. If you are already a follower (the thing where your cute face pops up with all the other cute faces of people following), comment telling me so.

Sample Entry 

I am a follower!


For Your Second Entry:

Take a moment to browse the Fresh Baby website: http://freshbaby.com/. Then comment saying you did so.

Sample Entry

I looked at the site--I like that they have podcasts!


For Your Third Entry:

Like Fresh Baby on Facebook. Comment telling us you did so. You might already like it if you entered the giveaway last year.

Sample Entry
I like it on Facebook!


For Your Fourth Entry:

Like this blog on FacebookAlready do? Tell me so. Comment saying you are a fan.

Sample Entry

Hi! I like on Facebook!


For Your Fifth Entry:
Follow Fresh Baby on Twitter. Then comment saying you did so. Include your Titter ID.


Sample Entry

I follow on Twitter! @valplowman


For Your Sixth Entry: 

Change your status on Facebook to talk about this blog giveaway with a link to this review. Leave a comment saying you did so.

Sample Entry

I changed my status!


For Your Seventh Entry:

Follow me on Twitter. Once you have done so, come back and comment and include your Twitter ID. Already do? Comment saying so.

Sample Entry
I follow on Twitter! @valplowman


Entry Rules
  • You must leave a comment in order to have an entry.
  • You must leave a separate comment for each entry. This is not so I can get lots of comments--it is because it makes it a million times easier to choose a winner. It takes less time, and less time is good. Plus, it makes sure I don't miss an entry.
  • You don't have to do all seven entries...for example, if you just want to follow this blog, you can just do entry one.
  • One entry per comment.
  • Up to seven entries per person.
  • You must fulfill the rules of each entry for each entry to count. If I see the entry is not valid (did not meet entry requirements), I will disqualify your entry. Trust me, I check.
  • Entries will be accepted until 11:59 PM Friday, April 29 Mountain Standard Time.
  • The winner will be randomly selected at random.org
  • The winner will be announced Saturday, April 30.
  • If you would like, you can add your email address to your entry. If you are the winner, I will email you to let you know. You do not need to add your email address in order to win. I understand not everyone wants to share their email addresses with the world. I will announce the winner on the blog, so you can check the blog Saturday to find out if you won.
  • Once the winner is announced, you will have one week to contact me or another winner will be chosen. Be sure to check back. The only thing worse than not winning is to win but not realize it in time!

Making Babyfood Tip

As McKenna has gotten older, I have come to realize a great little tip for making babyfood in mass quantities.

If you are making babyfood for 2-3 months (or more), my tip is to not thin it much when you make it initially. I discovered this accidentally. I made some food that I just didn't add much water to (carrots). It was smooth, but thick. When she was younger, I would add water to get it as thin as she needed it. As she got older, however, I would add less and less water until I didn't add any.

As they grow, their consistency needs change. If you make it thicker, you can always add water when you serve it, but you can't take the water out. So, if you are making a large batch, try not adding much water so the food can "grow" with your baby.

RELATED POSTS/BLOG LABELS:

Index: Making Babyfood

In Action: Making Babyfood

I wouldn't consider myself a babyfood-making expert, but I have done it enough that I can write about it. When Brayden was a baby, I was reading about making babyfood in What to Expect the First Year. In it, they basically said that you really couldn't match the sanitary conditions of baby food making companies. Because of that, I decided I wouldn't try it. I didn't want to get my baby sick!


Looking back, I really wish I hadn't read that, or at least that there had been more encouragement in What to Expect the First Year. Once I had been doing this blog for a few months, Kaitlyn was coming up on one year old. I had noticed that there were a lot of moms out there who made their own baby food. I asked about it, and so many of you told me how easy it was. I decided when I had my next baby, I would try making baby food.

Let me tell you, it is easy! It is a lot easier than you would ever imagine. Yes, it takes time. Yes, it takes more time to make babyfood than it does to buy babyfood (unless you live really far from the store...but you go to the store to buy food for your family already). So why would I do it when I have three kids? Here are my reasons (in no order):

  1. SANITATION: Wait, didn't I just comment about what that book said? Didn't it say your kitchen could never match the sanitary conditions of baby food manufacturers? Yes I did. Things have changed. Or I have changed. I don't necessarily believe that anymore. There have been so many recalls recently in the United States. I am not trying to get political, but when large corporations recall food because people are dying, and they then disclose that there are dead rats in the plant...it makes me skeptical. I am disillusioned. I no longer trust these companies implicitely. Yes, I once did. I can be naive. I am the type to trust until my trust is broken, but then it is hard to earn my trust back. I definitely hope that babyfood manufacturers are more cautious and careful, but I don't know that they are. I know what is in my kitchen. I have full control over it.
  2. HEALTH: My guess is that babyfood manufacturers make their food as soon as they can after picking it. That is my hope. However, I grow a garden, and I have food right in my backyard. What I don't grow, my husband's grandparents do. I am very fortunate in this way. I know what is done to my vegetables and fruits. I can also make the babyfood as soon after harvesting as possible. Fruits and veggies lose nutrients as they are harvested, so the sooner they are prepared, the better. This is a benefit I have and one compelling reason for me to make babyfood myself.
  3. MONEY: Along the same lines, money! Since we grow a garden and can get so much for free, it seems silly for me not to make it. It is free babyfood! If you don't grow a garden, it is still a lot less expensive (in most cases) to make it yourself if you buy it from the store. There are times of year that certain things are quite expensive (like fruit around here in the winter months).
  4. CHALLENGE: Okay, I admit it, I like a challenge. It was something I hadn't done before and I wanted to see if I could.
  5. REWARD: I find it very rewarding to make the food from scratch. I actually get a bit giddy inside when I make McKenna her food.
  6. TASTE: I find it tastes good enough I would eat it, which I can't really say for all store bought baby food.
Now, I find making babyfood to be easy. Most people seem to agree, though some say it is hard. Yaron (author of Super Baby Food) says she thinks it is easy and she is no cook. I do cook. I make most things from scratch. I even grind my own wheat to make bread...so I can't say it is easy from a non-cooker point of view, but others have. Let me point out that I have been making baby food while having three children, packing my house, moving, and unpacking my house. I can only imagine how much easier it would have been if I had done with while Brayden was my lone child and we weren't moving :)

For anyone interested in making babyfood, I encourage you to try. I also want to point out that for me, making babyfood is not an all or nothing situation. McKenna does get store-bought babyfood. I like to keep it on hand for traveling. I also give her store-bought before I can make it. I like to make it in masses, and I have been making it as it has been in season. Thankfully, for me, not everything is in season at the same moment. Also, she has been getting store-bought prunes. Amy, a blog reader, told me she buys prunes and makes them. I have purchased some prunes and intend to make them, but I am making my food that will spoil first.

So my point is, you can make some baby food at home and feed some store bought baby food.

SUPPLIES
You really don't need much for making babyfood, and you probably have just about everything you will need already.
  • Knife
  • Cutting board
  • Peeler
  • Possibly a pan for cooking if you are making things like peaches before baby can have them raw.
  • Cookie sheet/baking pan (if you want to bake things in the oven, like squash).
  • Spoon
  • Bowl
  • Oven
  • Freezer
  • Ice cube trays
  • Wax paper or cling wrap
Okay...there might be something missing from the list, but so far, you can see that it is really basic. There are a couple of things you might not have:
MAKING FOOD TIPSI won't go into the process of making things here; that would be one very long post. Here are my tips for making the process it easier on yourself:
  • MAKE IN BULK: I make it all in bulk. It takes about the same amount of time to make one ice cube tray of food as it does one, so it saves more time if you make more at a time.
  • MAKE ONLY WHAT YOU NEED: While you want to make in bulk, the food only lasts so long. Try your best to calculate about how much your baby will eat before it goes bad and make that much. For example, peaches last two months in the freezer. You don't want to make 6 months worth at one time and have to throw 4 months worth away.
  • MAKE WHAT YOU CAN STORE: You will find baby food quickly starts to take up a lot of space in your freezer. We already owned two refrigerator/freezer combos, and both freezers are stuffed full. Just today, we bought an upright freezer. I jokingly told a friend that I guess making babyfood didn't save us much money after all :). We had actually been planning on buying one anyway. It just moved up the priority list with all of the baby food. So make what you can store in your freezer. If you want a rounded menu (green veggies, orange veggies, and fruits), you won't be able to make so much at one time and fit it in one freezer.
  • INVOLVE THE FAMILY: Making babyfood alone isn't hard, but it does take time. If you can involve another member of the family, it can shave a lot of time off. I even have Brayden help me (he loves to help in the kitchen). I have him twist the food mill while I push it down. Doing it a few times by yourself is no problem, but 20 times later, your hands start to hurt! It really is a big help to have Brayden help me.
STORING TIPS
  • FREEZER BAGS: I put my baby food into freezer bags once it is all frozen. Yaron suggests using small freezer bags. I have found this to be a good idea. When you open and close over and over, the food doesn't stay as fresh, so the smaller the bag, the less food to go through while trying to keep it fresh.
  • LABEL: Be sure to label it. Peaches and squash look a lot alike when frozen.
  • GROUP IT: I put my food in small freezer bags, but then put one of each bag that I am using into a gallon sized freezer bag. This helps in a few ways. One is that it is extra protection for the food being stored. Another is that it is easy to find the food I need each morning when I am getting the food out. Before I started doing this, I would search through the freezer trying to find a particular bag. You might put things back in the same spot, but if more than one person lives in your house who uses the freezer, he (or she) might not.
USING FOOD TIPS
  • GET IT OUT: Each morning, I get out what McKenna will eat for the entire day and put it in bowls with lids on them. I then put the bowls in the refrigerator so the food can start to defrost.
RESOURCES
There are two resources I like best.
  • Wholesome Babyfood.com: This is a great site, and is really the only resource you would need. Something nice about a website is that it is dynamic and they keep current recipes on the homepage. For example, as I write this post, it is October and they have a quick link to pumpkin recipes for baby. It offers lots of different recipes for each food. If you check out the avocado section, you will see several different ways to prepare avocado for your baby. This isn't really necessary; baby is fine with the same old thing over and over, but you might find it fun.
  • Super Baby Food : This is my favorite resource. I am more of a book person than a website person. I like to have books to look through. I keep this book in my kitchen with my recipe books. This book is worth it even just for the section on how to choose, store, prep, make, and keep all fruits and veggies. I use it for the whole family! If you prefer books, I would get this.
Please add your own tips! Like I said, I am new at this. I am sure many of you have some great things to add.

DISCLAIMER
If you do not feed your baby homemade baby food, please do not take this post as an attack at you. You do not now need to fret or worry about this. I only intend this to be encouraging for anyone out there who wants to try, not a condemnation for those who don't want to try.

RELATED BLOG LABELS:

Buy Pears

My husband's grandparents gave us a bunch of pears they grew so I made a month's supply for McKenna (6 months) this week. As I was doing so, I noticed in Super Baby Food that pears are good in the freezer for one year (as baby food cubes)!

If you have room in your freezer, you should go out and buy a whole bunch of pears and make baby food out of it. Pears are a great price right now (at least where I live) and are in season. They taste better and are cheaper than they will be 6 months from now. And they will still be good in your freezer ONE YEAR from now! Wow. Just thought I would share.

McKenna Baby Summary: Week 22

First taste of peaches
This was a great week. McKenna turned five months old this week! I can't believe it! She is so fun.

NURSING
Things are still uneventful. McKenna just nursed this week without talking or biting.

WAKETIME LENGTH
Waketime length kind of extended. I didn't really officially move it, but the morning waketime went from 55-60 minutes. I said it in the past, but she no longer is super-sensitive to waketime length. A five minute sway doesn't affect her nap at all.

I noticed this week that now that she is older, she can be awake in her crib for part of waketime without me needing to count it toward total waketime. As a newborn, you need to count every minute awake. But as they get older, time in the crib is more restful than out, so waketime isn't the same minute for minute out of the crib and in the crib. The most I have ever had her wait in her bed is 5-10 minutes, but she didn't need to go down 5-10 minutes earlier. That likely has something to due with the fact that a five minute sway doesn't negatively affect her nap.

DROPPING NAPS
At the beginning of the week, I thought she might be done with the fourth nap for good. Mid-week, she had a few days where she really needed the fourth nap. By the end of the week, she didn't need it again.

NIGHTTIME SLEEP
McKenna had been sleeping until seven consistently. For a couple of mornings, she started waking early again. Not very early; only 10-20 minutes. I decided I thought she was waking early because she needed to go to a larger diaper at night. So for nights, she now sleeps in a size three and during the day she wears a size two. She is once again sleeping through. She usually makes it until 7:30. I sometimes need to wake her at 8:00. I have decided our 30 minute sway will be 7:15-7:45 for now, with 7:30 being our typical morning waketime. If she will consistently go to 7:30, I might sway 7:30-8:00 (8 would be nice for the weekend :) ). This week I let her sleep later a few days because it was our last week before Brayden started preschool. I thought we would make it a relaxed week.

One nice thing is that my body is used to her sleeping until at least 7 consistently, so I sleep until 6:30 or 7:00 consistently, too :)

SOLIDS
We made a lot of progression with solids this week. I started having her eat solids three times a day. By the end of the week, I started having her eat solids at her first feeding so I could train her metabolism toward eating breakfast.

I still nurse McKenna a full feeding before giving her solids. Since she eats solids well, I don't see us ever changing that.

I gave McKenna bananas this week. In Super Baby Food, Yaron says she doesn't understand why parents feed their babies store bought bananas since they are so easy to make. I fed Brayden and Kaitlyn store bought bananas, but I want to make most if not all of McKenna's food. So I made her bananas.

I have to say, I agree with Yaron! What was I ever thinking? Brayden and Kaitlyn both hated bananas worse than any other food until they started eating real bananas. McKenna LOVES bananas. Her first bite, she didn't make a strange face. She couldn't eat fast enough. She wanted a lot more, but I didn't want to give her too much in case she had a negative reaction.

As I was feeding her the bananas, I was struck by how different home-made bananas look from store bought. Really different. It made me wonder what they did to store bought bananas! Most store bought baby food looks and smells like the food it is representing...but not bananas. If making baby food is not your style, you should consider making bananas. When you consider how cheap bananas are, it is worth it! Right now, where I live, bananas are .20 cents a pound!

Okay, on to peaches. I also made peaches for McKenna at the last day of this week. For a five month old, peaches need to be cooked before being mashed up. So I cook a pound at once and froze a whole bunch. McKenna is not as thrilled with peaches (not surprising to me; both Brayden and Kaitlyn didn't like them). She will eat them happily mixed with her rice. I figured that way, they wouldn't be such a potent flavor while she got used to it.

Right now, I am introducing foods to her that I can either easily make (bananas) or we grow ourselves (peaches). I plan to make applesauce soon (homegrown), but I won't be giving it to her yet. I also plan to make carrots soon (also homegrown), but you aren't supposed to feed homemade carrots to babies until they are seven months old, so I will be waiting a while to make them so they can keep in the freezer.

McKenna didn't try to put her hands in her mouth at all during feedings this week.

I fed her solids at breakfast. She then went 3.5-4 hours until the next feeding, so we did lunch then. We then did just a nursing. We then did dinner at the next feeding and just a nursing before bed.

SWADDLING
My feeling is now that McKenna will soon be ready to drop the swaddle all together. I want her to drop it before I drop the dreamfeed.

THUMB SUCKING
McKenna finally decided she likes to suck on her thumb this week. She has previously gone back and forth among many different finger combinations. This week she stuck to the thumb and seems quite pleased with it.

ROLLING
I am happy to say that she hasn't rolled onto her tummy during sleep. At least that I know about.

MOVING
We have some big news. We will soon be moving. At the beginning of July, we put our house up for sale. It was a crazy time as we got things ready to sell and had to keep the house spotless :) Happily, it sold a little over a week later. Since then, we have been packing. We bought a house a few days ago. We will be redoing the carpet, flooring, and paint, as well as build and remove some walls all ourselves (if this sounds like a lot to you, it is nothing to us :) ). It will be a crazy couple of weeks. We are only moving a few blocks away.

I am glad McKenna is solidly sleeping through the night. I am debating if I should try to drop the dreamfeed before we move or after we move. I am also aware that once we move, I will have to re-figure out how to dress McKenna for sleeping, but I think I know her well enough now to have a good idea where to go.

If any of you have great moving tips, I would love to hear them!

TEETHING
I have suspected teething pains in McKenna for at least a month. She is most defnitely teething. I am really hoping this is a false run and she won't get teeth in yet. But it is looking close. She doesn't complain at all. She isn't fussy and she is sleeping well, but you can see the tooth.

OUR SCHEDULE
I will now start at 7:30 as an average

7:30 AM--wake, nurse, solids (1 T rice. I will add 1 T peaches this next week)
8:30 AM--nap
11:00 OR 11:30 AM--nurse, solids (at least 4 T bananas)
12:00 OR 12:30 PM--nap
2:00 OR 2:30 PM--nurse
3:15-3:45 (75-90 minutes later) PM--nap
4:30 OR 5:00 PM--nurse and solids (2-4 T sweet potatoes)
7:00 PM--nurse and straight to bed

Sometimes she eats after only two hours in the evening since she is extending her day out right now. This is a temporary situation and it is fine with me for now. I know it won't last too long. I find that preferable to having a fourth nap and eating at a 3 hour interval, and thus having a later bedtime. I want bedtime consistent.

HELPFUL BOOKS/WEBSITES
RELATED POSTS/BLOG LABELS

Book Review: Super Baby Food

Since starting this blog, I have often heard great things about the book Super Baby Food by Ruth Yaron. Because of this, I did a post stating this could be a good book to read (Book Recommendation: Super Baby Food ), but I hadn't read it yet.

I just finished reading it and WOW! I love this book. Really, really love it. It is 560 pages of information, followed by another 33 pages for bibliography and an index. When I say it is information, I mean it is full of information. There is no wasted real estate in this book; each word is written to provide information.

As I was gushing over this book, my husband pointed out that not all people would find the same joy from reading it as I did. Like I said, it is full of information. It is practical and has very little, if any, fluff. That is my sort of book! Yes, of course I love my fiction books, but when I am getting a reference book like this, I want information. This reads much like a textbook would. Many (okay, most) will perhaps find that boring. Yaron has done her research. Certain parts of the book can get really technical; Yaron realizes this and tells readers to skip to page X if they don't want to read about certain topics. But realize that you are getting every penny you spent out of this book.

The author seems very down to earth to me. She has written the book so that you don't have to read every word to understand what she is talking about. She has it cross-referenced throughout the book. She also gives advice for various levels of making baby food--it isn't an "all or nothing" system.

Are you wondering what is in this book? Let me give you a list:

  • Feeding Your Baby: This section includes information on which foods to introduce first at at what ages certain foods are safe. She also includes amounts of food a baby should be eating at various stages. I know that many moms worry about this. Included in this is serving sizes. She also includes amounts of liquid baby should drink each day. Information about the digestive system is also included. Yaron discusses finger foods, snacks (healthy!), teething foods, table foods, and more. She also discusses feeding your baby month by month.
  • Preparation and Storage of Food: Yaron assumes the reader knows nothing about cooking. She describes how to buy, clean, store, prepare, freeze, reheat, and feed fruits and veggies to your baby. She goes over food safety so you can safely handle foods.
  • Recipes: There is a section on recipes to make foods for your toddler and family that are very healthy and easy to prepare.
  • Fun Stuff: This section has many ideas for having fun with your toddler, from decorating foods to recipes/instructions for arts and crafts, homemade toys, and homemade gifts.
  • References and Appendices: This section has information on the nutritional values of different foods. She also has recipes for homemade cleaning products. There is also a section on Nutrition that explains how the body uses different nutrients.
I definitely think this book is worth owning. I give it my highest praises and recommendation.
RELATED POSTS/BLOG LABELS